Emira JB4 Tuning Now Available for I4 & V6 Cars!

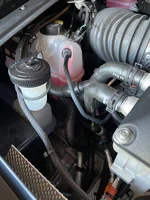
Do you more info on the external boost pressure sensor adapter? I was looking for one to add as a gauge input. Ended up modifying one from a different application.
I heard this was a Mazda part with minor modifications, but unfortunately has been discontinued. I was told I'd be in big big trouble if I broke it 😰
 
Great information, thank you for sharing. These numbers are definitely in alignment with how JB4 "feels" compared to stock. I'm not surprised that there is a ~80bhp HP increase because the instant power increase when toggling on/off JB4 on the fly is significant, not just "noticeable". It truly takes the car from "this feels quick, but not altogether punchy" to outright "this is plenty of power" in my view having been running JB4 Map 2 24/7 since last summer.
We have to meet up soon, so we can compare our cars feel. JUBU 460 vs the JB4.
 
The dyno figures should not be taken as absolute values. I just use the numbers to see the deltas. The only thing I took away from this session is that the JB4 showed constant boost increase and added over 80 horses over OEM on this day using this fuel.


Not sure if it makes a difference at WOT, but used Track mode.


I stay away from calculating / guestimating crank power from wheel numbers. As for fuel used, it is what is branded as "high octane" in Japan, which requires "at least" RON96. The actual octane content may vary from pump to pump, and you may get RON98 or better in some places.
Glad someone is doing it right. Control variables, see results. Dyno is for relative not absolute numbers.

👏👏👏
 
I ran mine today and plan to make a separate thread with a very detailed write -up. 14 total pulls over three different sessions.

My car only gained torque between map 1 and map 2. After 5,500rpm the graph gets real squirrelly. 93 octane
shell v-power. Sea-level. 2025 V6 6 speed. Eventuri intake, GRP mid pipe, GRP cat delete, GRP Ti-Exhaust, milltek v2 valve controller open.

IMG_5597.webp
 
I ran mine today and plan to make a separate thread with a very detailed write -up. 14 total pulls over three different sessions.

My car only gained torque between map 1 and map 2. After 5,500rpm the graph gets real squirrelly. 93 octane
shell v-power. Sea-level. 2025 V6 6 speed. Eventuri intake, GRP mid pipe, GRP cat delete, GRP Ti-Exhaust, milltek v2 valve controller open.
The minor difference between Map 1 and Map 2 isn't suprising, but the wavy top end looks wierd. Have you compared the dyno chart with the JB4 log? Trim levels?
 
For you all i4 owners running jb4 without the obd2 plugged in, can you tell me what PSI readings you are seeing on your boost gauge in the jb4 pro app?

Is the boost reading accurate? I dont recall seeing the boost reading anywhere over 25psi at all even on map 3. Is there something wrong?
 
For you all i4 owners running jb4 without the obd2 plugged in, can you tell me what PSI readings you are seeing on your boost gauge in the jb4 pro app?

Is the boost reading accurate? I dont recall seeing the boost reading anywhere over 25psi at all even on map 3. Is there something wrong?
You should really be data logging your initial pulls and having Burger verify everything is OK. The logs will also show max psi and you can look at the CSV yourself.
 
Mine is in the over 25 psi range as I haven't had a dyno but the best indicator of the extra power is from my performance numbers on the draggy pro. They indicate close to 500 horsepower as I've been able to get a 3.2- 060 and 11.4 quarter mile with a DA of 2700 feet
 
My JB4 is suppose to be ship next tuesday and I’m ready to pass the OBD2 cable from the cabin to the engine bay as soon as I get it.

I did not have to remove the wheel and the inside fender.

I used an electrical cable and I will use it to pass the JB4 cable thru.

The wait is almost over.
View attachment 64815View attachment 64816View attachment 64817View attachment 64818
This post was so helpful for me. Installing the OBD was way more difficult than the JB4 unit itself.

A few quick learnings:

1. You only have to take off one driver side rear quarter panel to reach this section. You can feel for the grommet by hand. Removing any additional panels does not provide more access.

2. Removing the panel the first time was a pain because it didn't budge. Here's the process I used that is easy now.
[1] Pull the clips up first on the side closest to you. Then you have to pull the panel free, but it doesn’t really budge.
[2] Pull the bottom edge of the panel towards you and the bottom tab comes free. However the top is still tucked under the speaker.
[3] Pull the panel down into the recess. This lets you get the top edge free.
[4] Now you can pull and contort it out.

3. Use the electric cable as shown or I used monster speaker wires. Coaxial cable didn't work because it was too stiff and got stuck. The speaker wire allows you to easily feed it through the hole and it just keeps going through. I found the cable exit in exactly the same spot as this picture.
 
This post was so helpful for me. Installing the OBD was way more difficult than the JB4 unit itself.

A few quick learnings:

1. You only have to take off one driver side rear quarter panel to reach this section. You can feel for the grommet by hand. Removing any additional panels does not provide more access.

2. Removing the panel the first time was a pain because it didn't budge. Here's the process I used that is easy now.
[1] Pull the clips up first on the side closest to you. Then you have to pull the panel free, but it doesn’t really budge.
[2] Pull the bottom edge of the panel towards you and the bottom tab comes free. However the top is still tucked under the speaker.
[3] Pull the panel down into the recess. This lets you get the top edge free.
[4] Now you can pull and contort it out.

3. Use the electric cable as shown or I used monster speaker wires. Coaxial cable didn't work because it was too stiff and got stuck. The speaker wire allows you to easily feed it through the hole and it just keeps going through. I found the cable exit in exactly the same spot as this picture.
I’m glad if I helped ! Cool 😎
 
IMG_2393.webp

Where are you guys routing your JB4 cable? I zip tied to existing hoses so that the cable is not touching anything metal and is floating in the engine bay. I saw someone else mount it completely outside of the engine bay running along the plastic I think underneath the engine cover. Thoughts? Any long term users with observations?
 

Attachments

  • IMG_2394.webp
    IMG_2394.webp
    225.7 KB · Views: 14
Run it between heat shield and body ;zip tie to stick on pads for ties.
Also, installing cable for OBD dongle much easier/quicker if run through opening in rear quarter panel-behind door jamb cover.
(detailed in another thread).............may need to enlarge small opening to get plug end of cable through; easy to do with rat tail file..........
 

Create an account or login to comment

Join now to leave a comment enjoy browsing the site ad-free!

Create account

Create an account on our community. It's easy!

Log in

Already have an account? Log in here.

Supporting Vendors View all →
Back
Top