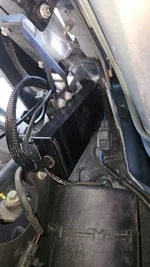
DIY: V6 Burger Motorsports JB4 Installation

OK, drove it a fair bit yesterday, normal driving, a couple of squeezes here and there (tunnels, we all know the feeling) and everything great. All in MAP3.

I did have a chance in the evening to give it one good push through 2nd, third, to fourth and off to Limp mode ;).
Saying all that this is DEFINETLY a 500HP+ car now.

Got an error code of P0087 Fuel/Rail System Pressure- Too Low Bank 1.

I am running the OBD link to the JB4 but short of logging it is really limited. Would love to see them improve it with Carplay and a proper database for error codes.
I disconnected the JB4 and went back to my Kiwi4 and OBD Fusion with the $120 paid Enhanced Diagnostics which is invaluable. Its got the correct codes and full carplay and config of PIDs to log and display.

Everything reset fine so I can only conclude that I was under a quarter of a tank and it sucked air and or the stock fuel pump isnt keeping up. Ive moved back to Map2 for the moment and looking at options.

Also nice to see the stock ECU safeties still active which was another reason I didnt mind trying the JB4.

Below photo of OBD Fusion on dash. You can read whilst driving as well via carplay. Ignore the O2 sensor fault, I know what that is. Need to replace it but Lotus want $800 for a new O2 sensor!!!!!. Just need to find the part number and find suitable elsewhere and change connector if required.

1769071730352.webp
 
What octane rating fuel do you need to run map 3?
 
98+ which according to JB4 when I first looked is your 93+. Havent seen any telltale signs in the logging to show any concern so all really good to be honest. Jubu also quote that the stock pump wont keep up over 500
 
Which rules out BP Ultimate. Only Shell Vpower and Esso Synergy and some supermarket options
 
I think US 98 is a UK 98/99
US 91 RON = UK 95 RON (E10) e.g. Regular Unleaded
US 95 RON = UK 98 RON (E5) e.g. Super Unleaded

US 100 RON would be race fuel in the UK - you can get it but not from petrol stations.

I think @MTV is saying Map3 is OK with UK Super.
 
Last edited:
What is Map3?
Different mappings on the JB4 tuning piggy-back. IIRC map 0 is standard and map 1, 2, 3 etc get more aggressive and so need fuel that prevents predetonation.
 
US 91 RON = UK 95 RON (E10) e.g. Regular Unleaded
US 95 RON = UK 98 RON (E5) e.g. Super Unleaded

US 100 RON would be race fuel in the UK - you can get it but not from petrol stations.

I think @MTV is saying Map3 is OK with UK Super.
I don’t think it’s quite as clear cut as that. The ‘super’ brands in the UK range from 97 RON (BP) to 99 RON (Esso and some others). All of them are suitable for Map 2, but Map 3/4, BP is not high enough. You need a 98 minimum.
 
I don’t think it’s quite as clear cut as that. The ‘super’ brands in the UK range from 97 RON (BP) to 99 RON (Esso and some others). All of them are suitable for Map 2, but Map 3/4, BP is not high enough. You need a 98 minimum.
Yes, this is true. My comment was more about the statement/question that US and UK RON is equivalent.
 
Different mappings on the JB4 tuning piggy-back. IIRC map 0 is standard and map 1, 2, 3 etc get more aggressive and so need fuel that prevents predetonation.
Yes, I have JB4 that runs Map2, just wasn't sure what Map3 was setup for.
 
”Boost” and "Boost2" are names of variables monitored, shown, and stored in the JB4's memory. The default gauges are configured to show "Boost" at the top of the screen, but the Emira does not populate that variable and that gauge just sits there showing nothing. Variable "Boost2" has data in it, and configuring the gauges to show this will make it more enjoyable.
I stand corrected. "Boost" does change with actual boost, and confirmed with Burger. Use "Boost" not "Boost2".
 
... But it takes it to 911 Turbo level which is one of my own benchmarks for quality and performance.
Can one of you guys make a road or draggy comparison video of jb4 map3 Emira compared to Stock CarWow style lol?

I saw the Dyno charts, but the reviews of map 3 sound so amazing I’m curious now.

It will probably easily give our cars better reps online compared to the strange ppl who don’t even own the car making videos for clicks.
 
  • Like
Reactions: MTV
They may not like him that much then
For me, the bracket was easy peasy doing it one bolt at a time. I actually didn't even have the deck lid all the way up because it was hitting my 4-post lift. It was maybe an inch or so away from being fully open. I was also averse to drilling the hole in the suggested location and found the large rubber grommet way down behind the lower corner trim piece and back panel. I pierced the grommet in the center in a "+" pattern just big enough to barely fit the plug though. The hardest part was guiding the plug up to the connector. In hindsight I should have removed the newly installed Eventuri intake first. Then it would have been much easier. I thought I took pics of the grommet but can't find them. The installation is nearly invisible now.
 
Can one of you guys make a road or draggy comparison video of jb4 map3 Emira compared to Stock CarWow style lol?

I saw the Dyno charts, but the reviews of map 3 sound so amazing I’m curious now.

It will probably easily give our cars better reps online compared to the strange ppl who don’t even own the car making videos for clicks.
Been wanting to at least do a 0-100 time at some stage just haven't had a chance, secondly doing it messes with my mechanical sympathy.
 
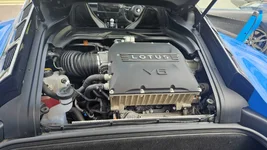
So here is another JB4 install (UK / Right hand drive V6 car)
I thought I would do things slightly differently, seeing as mine is a right hand drive car (UK V6 Manual)
Once I had the JB4 in hand, the wiring lengths appeared to be more logical to route differently than some of the videos I had seen.
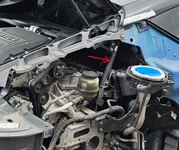
I zip tied the JB4 to this tubular brace, from within the engine bay under the right hand rear quarter, just above the electric cooling fan. It fitted super snug without interfering with anything. It was a tad tricky to reach, but once you remove the engine bay trims it's quite accessible from within the engine bay. I wrapped the tube with rubber first, an old BMX inner tube.
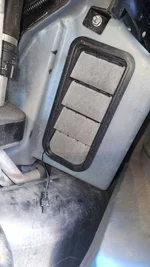
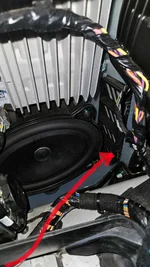
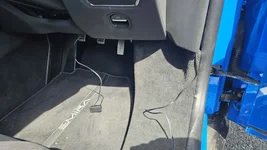
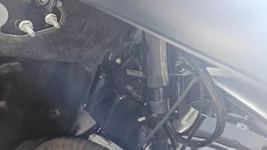
I routed the OBD cable from its plug under the steering wheel panel, along the sill and through the cavity where the rear subwoofer resides, Then 'fished' the OBD connection through the Flappy air vent in that right rear quarter.
(TBH I actually later removed the right rear wheel liner to check on, and tidy up the routing of the OBD cable and make sure it wasn't flapping about)
With this layout, the cables from the JB4 would all Perfect lengths to reach firstly the TMAP connector, and then onward to the MAF connector with no excess length or doubling back etc.
I was mindful from the beginning that with this particular layout there was a potential risk of the JB4 cabling being dangerously close to the top pulleys on the engine, if they were not properly affixed.
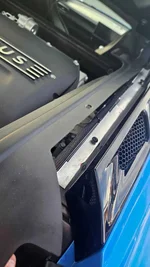
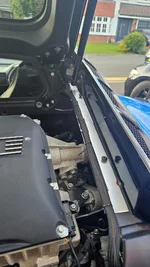
So, without wanting to have any ugly cable/Zip ties on show (which would have been quicker and easier) I made a small addition of a thin slat of alloy sheet that would lie underneath the trim piece I had removed which runs down the side of the rear quarter, next to the upward facing air vents. This was just a piece of scrap alloy that I tin snipped to size from an old garden heater hood I had in my garage (I hoard so much crap, but it always comes in handy). The plastic trim piece that covers this slat of alloy has a convenient pre-formed gully under its edge that was a perfect size for the JD4's cabling. I cable tied the cable along the alloy strip and used some thin 3M double sided tape to keep the alloy strip in place before it was all screwed back in place. This then prevents any risk of the JB4's cabling being at risk of moving, as it is totally entrapped. Hopefully the images will aid my explanation.
Zip tied cables where necessary and put the trims and covers back on, and looks quite tidy I think, plus it would be quite easy to remove in necessary, it would only require a couple of trim pieces to be removed, 3 allen screws, snip some zip ties and pull the OBD cable back through.
I appreciate this isn’t the super quick install that I have seen videos of, but I really don’t mind spending an extra few hours on my favourite toy 😁
 

Attachments

  • tidy.webp
    tidy.webp
    195.5 KB · Views: 77
  • trim part.webp
    trim part.webp
    137.1 KB · Views: 66
  • alloy plate.webp
    alloy plate.webp
    168.3 KB · Views: 90
  • through flaps.webp
    through flaps.webp
    172.3 KB · Views: 93
  • Subwoofer cavity.webp
    Subwoofer cavity.webp
    171.2 KB · Views: 80
  • cable.webp
    cable.webp
    187.5 KB · Views: 86
  • inner right wing.webp
    inner right wing.webp
    112.4 KB · Views: 86
  • position.webp
    position.webp
    55.8 KB · Views: 74
  • view from wheelwell.webp
    view from wheelwell.webp
    132.6 KB · Views: 77

Create an account or login to comment

Join now to leave a comment enjoy browsing the site ad-free!

Create account

Create an account on our community. It's easy!

Log in

Already have an account? Log in here.

Supporting Vendors View all →

Latest posts

Back
Top