DIY: V6 Manual 1st, 2nd & Reverse Adjustment - Hard To Get Into Gear

Thanks for posting this! I was having trouble getting into first, but adjusting the reverse lockout tab fixed it
 
Just did this adjustment. 1st to 2nd felt smooth enough when not moving but it wasn't as smooth as the other gears, and it was worse like sorta crunchy when moving so I thought it was worth a shot.

My plate was installed down so that the screw/washer was about 3/4 of the way up the whole travel. I moved the plate most of the way up so the washer shows just a tiny bit of gap to the bottom edge of travel; it felt easier to guide the shifter up and down when the plate wasn't all the way up.

I had a bit of trouble removing the center console and putting it back on. I have a couple tips for that:

- The clip at the very far end inside the phone tray is a plus shape like a screwdriver, so it seems pretty durable. Don't be too afraid of breaking it.

- The far side is held by said clip above and a tab clip in the center right above the hazard light, so you want to pull visualizing getting that out instead of pulling the corners specifically. This seems to be the hard part to get off and on, so I think it may be best for it to be last off and first in so you can move it in or out straight upwards.

- The pictures of the center console on the bottom of page 4 are the best ones to visualize where the other clips are.
 
After procrastinating for a year, I finally did the adjustment today. It was much easier than I thought it would. The center console was pulled up rather easily and I didn't have much trouble removing it. Then I was shocked how much variation there is from car to car. My original plate position was pretty much flush with the linkage:

IMG_4144.webp


I had to move the plate all the way up to get maximum clearance. But even with it all the way up, it still fully contacts the shifter guide when I move the shifter to the left. In my case I might need to shave it down a little bit more to get the right fit. After the adjustment I rowed through the gears in stationary but cannot feel any drastic difference going into 1st or 2nd. Reverse is easier though.

Lotus, what's going on with your QC??

IMG_4147.webp

IMG_4148.webp
 
After procrastinating for a year, I finally did the adjustment today. It was much easier than I thought it would. The center console was pulled up rather easily and I didn't have much trouble removing it. Then I was shocked how much variation there is from car to car. My original plate position was pretty much flush with the linkage:

View attachment 76826

I had to move the plate all the way up to get maximum clearance. But even with it all the way up, it still fully contacts the shifter guide when I move the shifter to the left. In my case I might need to shave it down a little bit more to get the right fit. After the adjustment I rowed through the gears in stationary but cannot feel any drastic difference going into 1st or 2nd. Reverse is easier though.

Lotus, what's going on with your QC??

View attachment 76827
View attachment 76828


Did you try removing the plate and rowing the gears to see how 1st and 2nd feel?
 
your picture (green line) confirms a suspicion that on some (maybe many) of these cars the lockout plate started slipping down over time. so when anyone does this "fix", they should make sure to torque that bolt down pretty good.
A little blue locktite is a good idea.

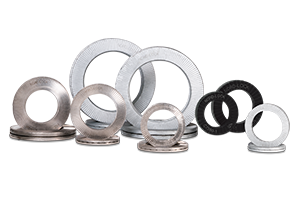
Nord-locks are pretty great, maybe a bit overkill in this application.
 
Did you try removing the plate and rowing the gears to see how 1st and 2nd feel?
No I didn't. I plan to do a transmission oil change soon and drive it around to see if the shifter feel improves. If still not good enough I will try removing the plate.
 
No I didn't. I plan to do a transmission oil change soon and drive it around to see if the shifter feel improves. If still not good enough I will try removing the plate.
If the plate can't be adjusted to address the shifting, your crossgate cable needs to be adjusted to shift neutral to the right a bit.
 
If the plate can't be adjusted to address the shifting, your crossgate cable needs to be adjusted to shift neutral to the right a bit.

Agreed! if you're finding you have to adjust your plate to the extremes, shifter needs crossgate adjusted. This is just for fine tuning.
 
I took it out for a short drive today and still noticed a meaningful improvement. When driving slowly, it's easier to get into 1st gear from neutral, shift from 1st to 2nd, 2nd to 3rd and 3rd to 2nd. But under load, it's still difficult to shift from 1st to 2nd.
 
If the plate can't be adjusted to address the shifting, your crossgate cable needs to be adjusted to shift neutral to the right a bit.
Thanks! Do you know how I can adjust the crossgate cable? Service manual didn't specify how to make the adjustments.

1770944161144.webp
 

Gearchange Cable Adjustment - V6​

Print
Operation Code: 47.05.25-00

  1. Adjustment for 3rd/4th Gears​

  2. Remove centre console assembly. Refer to procedure.
  3. asm1710.png
  4. Remove M5 nyloc nut securing crossgate cable rod end to crossgate lever.
  5. Disconnect crossgate cable rod end from crossgate lever.
  6. Loosen locknut securing rod end to crossgate cable.
  7. Position gear lever in neutral between 3rd and 4th gear.
  8. NOTE: Gear lever should move smoothly in either direction and positively return to neutral when released.
  9. Turn rod end clockwise or counterclockwise on crossgate cable in 360 degree increments to adjust cable length as required so that crossgate cable rod end slides onto crossgate lever retaining stud with no or minimal resistance.
  10. Install M5 nyloc nut securing crossgate cable to crossgate lever. Torque 5 Nm.
  11. Tighten rod end locknut securing crossgate cable to rod end. Torque 4 Nm.
  12. NOTE: Use two spanners to prevent crossgate cable from twisting during tightening.

    Adjustment for 1st/2nd and Reverse Gears​

    asm1711.png
  13. Loosen M5x20 bolt securing gearshift guide to gearshift lever base.
  14. Position gearshift lever so that 1st and 2nd gears can be selected with minimal or no resistance, then hold gearshift lever in 1st gear while pushing it left.
  15. Slide gearshift guide forwards or backwards as required until it touches reverse blocker plate and also pushes gearshift lever slightly right.
  16. Tighten M5x20 bolt securing gearshift guide to gearshift lever base. Torque 4 Nm.
  17. Position gearshift lever in neutral, then push gearshift lever left so that gearshift guide contacts reverse blocker plate.
  18. Check selection of 1st and 2nd gear, there should be no obstruction to forwards or backwards movement of gearshift lever.
  19. Check reverse gear can be selected with reverse collar lifted.
 
If you get to step 9 and the rod end is already smoothly falling into place as described there's a different problem. The lever neutral spring might have some adjustability but I'm not sure about that. You will have to poke around a little and see what can be adjusted.
 
If you get to step 9 and the rod end is already smoothly falling into place as described there's a different problem. The lever neutral spring might have some adjustability but I'm not sure about that. You will have to poke around a little and see what can be adjusted.
Thank you so much for the detailed instructions. I will try adjusting the cable without removing the entire center console later.
 
Thank you so much for the detailed instructions. I will try adjusting the cable without removing the entire center console later.
I just copied it from the workshop manual :)
 
If I’m not mistaken there is adjustment at the bell housing AND at the shifter for cross gate. Same as the gear selector cable. Both sides are a bushing with a jam nut, you can undo the jam nut and disconnect the end bushing and extend or contract it by threading it and then tightening the jam nut back against the bushing.
 
If I’m not mistaken there is adjustment at the bell housing AND at the shifter for cross gate. Same as the gear selector cable. Both sides are a bushing with a jam nut, you can undo the jam nut and disconnect the end bushing and extend or contract it by threading it and then tightening the jam nut back against the bushing.
I believe that the lever has a spring that helps return it to neutral. If it doesn't then the rest of what I'm going to write here is irrelevant.

The neutral position of the transmission and the neutral position of the lever have to be aligned. You don't want the spring force of the lever constantly loading the transmission when it's in neutral. It will wear the transmission. So the adjustment of cable length is limited unless the neutral position of the lever can be adjusted and that would be done by adjusting the spring in the lever. I know you can do this with some of the aftermarket levers on the Elise but I'm not familiar enough with the Emira to tell if that's possible.
 
The 1-2 shift has always been sluggish and getting to 1 & 2 when slowing down felt excessively notchy. I finally decided to try this and found my gear shift guide plate was at max gap. I loosened it and put it at the halfway point. Much better shifting feel. 1-2 shifts are still a little delayed due to the 2nd gear syncho but much smoother as I am not fighting a bad shifter alignment. Much improved.

Notes: Be patient with the plastic center piece. It is on pretty tight and takes quite a bit of force to pry loose. Use a plastic trim tool and gradually work your way around a section at a time and it pops off just fine. To unplug the start button, you press in on a tab on the plug, and it slides right out. You don't need to cut the zip tie and fully remove the console. With the start button unplugged you can lift it out of the way enough to make adjustment.
IMG_0696.webp
 
The 1-2 shift has always been sluggish and getting to 1 & 2 when slowing down felt excessively notchy. I finally decided to try this and found my gear shift guide plate was at max gap. I loosened it and put it at the halfway point. Much better shifting feel. 1-2 shifts are still a little delayed due to the 2nd gear syncho but much smoother as I am not fighting a bad shifter alignment. Much improved.

Notes: Be patient with the plastic center piece. It is on pretty tight and takes quite a bit of force to pry loose. Use a plastic trim tool and gradually work your way around a section at a time and it pops off just fine. To unplug the start button, you press in on a tab on the plug, and it slides right out. You don't need to cut the zip tie and fully remove the console. With the start button unplugged you can lift it out of the way enough to make adjustment.
View attachment 78615
You've done the hard part already... throw off the shift boot and just just go naked! You know you want to! Join us!!
 
You've done the hard part already... throw off the shift boot and just just go naked! You know you want to! Join us!!
Yeah! If you think your shifter isn't smooth now - just pull the thing designed to keep schmutz out of your linkage off and get some crud down there! :ROFLMAO:

FYI if you eat a burger in the car - dripped grease will increase shift smoothness, but sesame seeds will decrease it. 🍔
 

Create an account or login to comment

Join now to leave a comment enjoy browsing the site ad-free!

Create account

Create an account on our community. It's easy!

Log in

Already have an account? Log in here.

Supporting Vendors View all →
Back
Top