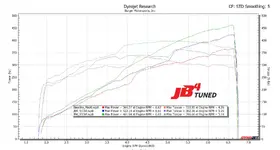
Time for another Emira V6 DIY, this time it's for the Burger Motorsports JB4!
Installation Overview
Instructions
This installation assumes you are using a Darkworks Design JB4 Stealth Bracket. If you aren't, please skip steps 3-7 and figure out a way to zip tie your JB4.
1. Optional: Install Mobile Wireless Smart Phone Kit to your JB4 if you purchased it.
3. Remove rear top engine cover
4. Remove left side (LHD) engine side trim
9. Route your cables as per the video or however you see fit
11. Plug in the JB4 Connectors into your MAF and TMAF sensors
12. Tie down and affix your wiring harness
14. Reinstall rear top engine cover
15. Reinstall front top engine cover
Installation Overview
Instructions
This installation assumes you are using a Darkworks Design JB4 Stealth Bracket. If you aren't, please skip steps 3-7 and figure out a way to zip tie your JB4.
1. Optional: Install Mobile Wireless Smart Phone Kit to your JB4 if you purchased it.
- 4 x H2.5 on the case
- Discard the extra small rubber plug
- 2 x phillips head screws that come with JB4 Mobile Kit
3. Remove rear top engine cover
4. Remove left side (LHD) engine side trim
- 4 x H4 button top screws
- Extreme Caution: Do not drop
- 2 x 7mm 6 pt drive bolts
- Extreme Caution: Do not drop
- 2 x 8mm 6 pt drive bolts that come with JB4 Stealth Bracket
- Extreme Caution: Do not drop
- This is probably the hardest part of this whole procedure
- 2 x H3 button top screws that come with JB4 Stealth Bracket
- Extreme Caution: Do not drop
9. Route your cables as per the video or however you see fit
- Don't touch the heatshield or the valve cover those get too hot with your wiring harness
11. Plug in the JB4 Connectors into your MAF and TMAF sensors
12. Tie down and affix your wiring harness
- I used 3 sticky 3/4" zip tie bases and 3 zip ties to affix the wiring harness to the outside of the engine bay box, the engine cover hides all the wiring once in place
14. Reinstall rear top engine cover
15. Reinstall front top engine cover
Last edited:


