Doc’s JB4 OBD wire routing DIY

I just wanted to take a moment to thank docron for the amazing JB4 OBD wire routing DIY post. The step-by-step instructions were incredibly detailed and clear, and I really appreciate the effort that went into explaining everything so thoroughly. It saved me a lot of time and frustration, and I’m sure others will benefit from it too. I especially love the approach of avoiding drilling holes – that's exactly the kind of solution I was looking for. Thanks to your guide, I was able to successfully route the cable yesterday. Thanks again for sharing your knowledge!
 
I presume you’d need an OBD extension cable if you have a UK car I.e with the steering wheel on the correct side.
 
I presume you’d need an OBD extension cable if you have a UK car I.e with the steering wheel on the correct side.

Extending the other side may be easier and cheaper...

1754659302653.webp
 
Like everyone else said, thank you so much for this post. Easy install! (FYI, I did end up cutting a corner off of the upper fiberglass to more easily feed the cable through as the pry method wasn't opening it up wide enough for me to make that possible.) It hides behind the facia and is incredibly small. No one will ever know. (After sanding the edges, you cant really tell it wasn't from the factory like that.)

All in all, beats another hole in the firewall!
 
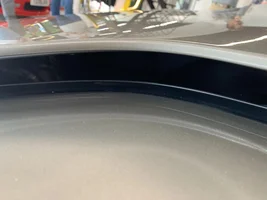
4. Loosen up rear quarter panel screws, dont need to remove them all the way. You could loosen the mounting bolt behind the Emira badge but I didnt and i didnt want to stick it back on. Using a pry tool, gently lift rear quarter panel just enough to be able to fish OBD plug thru gap. Pull string back into engine bay with attached OBD plug. Yay!

View attachment 65890

View attachment 65891
How on earth did you pry this panel far enough back? I can't get it beyond being 3-4mm too small and im using a tonne of force to move the panel - all bolts fully undone!
 
How on earth did you pry this panel far enough back? I can't get it beyond being 3-4mm too small and im using a tonne of force to move the panel - all bolts fully undone!
I personally took a dremel and cut a tiny piece of the inside lip. No one will ever know the difference.
 
I did this today following the method described and though it was a hassle, it does work nicely. Dremeling out a little corner of the quarter panel would probably be recommended because I had to pry it out very hard to barely get that small plug through there.
 
Any photo of the cutout to see what I am dealing with? Looking to install this next week. -thanks
 
Any photo of the cutout to see what I am dealing with? Looking to install this next week. -thanks
I could probably pop that panel loose for you. It’s tiny though. Give me a few
 
There is an also a rubber cover that can be sliced to pass the small end of the cable, it should be located on either side of the vehicle. For left hand drive cars, I pop the panel that contains the rear fuse box. Doing this way will have the wire coming out close to the bottom left side of the engine where I believe some cooling lines run.
 
Just a precautionary FYI. While installing the Optimotion rearview camera signal cable a few weeks ago, I used the same approach to route camera wire into cabin but this time on passenger side.

While removing the door jam panel, yellow retention clips were a tad tougher to disengage the panel on the passenger side. I cracked the panel maybe 5mm at the thinnest point while removing.

Stick you hand from the bottom under the panel to disengage that clip at the midpoint. Don't try to disengage panel from the top down.

23882.webp


23880.webp
 
Completed this install technique recently; very straightforward, simple.
One note: used a rat tail file (instead of Dremel)to open top area to pass cable through-simple and leaves smooth edge-still, shrouded cable with foam wrap around at pass through area…..
 
4. Loosen up rear quarter panel screws, dont need to remove them all the way. You could loosen the mounting bolt behind the Emira badge but I didnt and i didnt want to stick it back on. Using a pry tool, gently lift rear quarter panel just enough to be able to fish OBD plug thru gap. Pull string back into engine bay with attached OBD plug. Yay!


I couldn't make OBD go through. I had to drill on the top of the panel to make a enough space for the obd head.

4. Loosen up rear quarter panel screws, dont need to remove them all the way. You could loosen the mounting bolt behind the Emira badge but I didnt and i didnt want to stick it back on. Using a pry tool, gently lift rear quarter panel just enough to be able to fish OBD plug thru gap. Pull string back into engine bay with attached OBD plug. Yay!

View attachment 65890

View attachment 65891
I couldn't make the OBD go through. I had to drill a small hole on the top of the side panel.
 

Create an account or login to comment

Join now to leave a comment enjoy browsing the site ad-free!

Create account

Create an account on our community. It's easy!

Log in

Already have an account? Log in here.

Back
Top