I didn't see a guide on replacing/bleeding the Brake/clutch fluid so, I've put one together.
This information is purely my experience and serves only for your entertainment. I will not be liable or held responsible in what you do with this information. Please proceed at your own risk.
Tools needed:
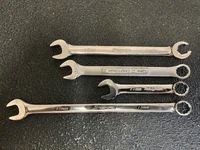
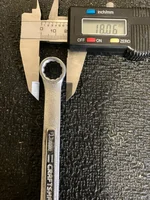
8mm Open ended wrench
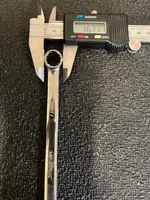
11mm Open ended wrench
T-30 torx bit
Pressure bleeder kit with 45mm European master cylinder reservoir adapter
Clear tubing for bleeder valves & Container to catch fluid (included in the kit above)
Favorite DOT 4 brake fluid
Towels/rags for clean up
Access:
Open front service access cover. Pop the three plastic covers and unfasten the T-30 torx bolt with the provided tool in the tool kit or T-30 Torx bit.
View attachment 62178
View attachment 62148
Remove the plastic cover on the driver side (LHD) by twisting the plastic fasteners 90 degrees.
Remove cover to explose the brake/clutch master cylinder reservoir (they're shared).
View attachment 62149
I used pressure bleeding tools to perform this job since it is much easier and faster, with better results.
This particular kit comes with the "European 45mm" adapter that works on our master cylinder reservoir.
View attachment 62185
Install the bleeder adapter. Pump the pump up to 10-15 PSI. Connect the pump to the adapter via the QD and slowly open the valve to check for leaks.
If no leaks are present, close the valve, slowly remove the QD from the adapter. Depressurize the bleeder pump and fill up the brake bleeder with your favorite DOT 4 fluid. Pump the pump back up to 10-15PSI.
BE CAREFUL WHILE HANDLING BRAKE FLUID. IT IS EXTREMLY CAUSTIC TO PAINT. If you spill any on your paint, immediately clean it up with water or risk paint failure.
Connect the the QD connector back to the master cylinder reservoir adapter.
I chose to flush the clutch master cylinder fluid first. I don't think it matters as long as you do both the clutch and the brakes.
Access to the clutch master cylinder:
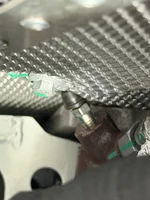
Open the hatch. Remove engine covers and locate the clutch slave cylinder. It will be towards the front of the tranmission, right next to the exhaust manifold heat shield. Going from the top seems to be the easiest way to perform this job.
Once you locate the slave cylinder and bleeder screw, remove the protective rubber cap.
Place snug clear tubing or utilize the 90 degree elbow adapter for brake tubing that was provided in the kit I linked. This makes it easier and less messy.
View attachment 62150
Once you have a container ready to catch the fluid, you can get ready to flush the fluid.
Tip: put a towel right underneath the bleeder valve. This will help catch any seepage.
If you haven't already pressurized the reservoir, go ahead and do so now. Once pressurized, head back to the slave and open the bleeder valve. It is a 8mm hex.
Open the bleeder and watch the fluid. After you feel sufficient fluid has been replaced. Close the bleeder.
At this point, I chose to test the clutch pedal feel before buttoning everything back up. If you feel the pedal is mushy or doesn't feel right, keep bleeding. If everything feels good. Remove your tubing, have a towel or rag handy as there will be some spillage.
Replace protective cap. And reinstall all the engine covers. Job complete for the clutch fluid.
Brake fluid replacement:
After the clutch fluid is replaced, I flushed the brake fluid. Same setup procedure for the master cylinder reservoir.
Pop off the rubber protective covers on the bleeder screws. There are 2 bleeder valves per caliper, one on each side.
View attachment 62179
Attach your hose to the caliper bleeder screws. They are 11mm hex.
View attachment 62180
Ensure that your pressure bleeder still has sufficient fluid and sufficient pressure from the clutch fluid replacement.
I chose to go Left Rear, Right Rear, Right Front, and Left Front calipers. I honestly don't think it makes a difference, but I'm just used to doing this on all my cars.
Once you have a container to catch the fluid, crack open the bleeders and watch the fluid.
Close the bleeders once you feel you've sufficiently flushed the brake fluid. Rinse and repeat for each caliper.
Clean up any seepage from the bleeder valves as it may impact the finish on the caliper.
Once finished, replace protective cover. Job complete.
Dispose of your used brake fluid responsibly. Bask in the glory that you likely saved tons of money vs going to the dealer, performed the job right, and keep your car happy! Enjoy!