Blackthought_
Emira Fiend
Swapped out the wheels. Black wheels are the winter setup

Bronze wheels are the summer setup


Bronze wheels are the summer setup
Follow along with the video below to see how to install our site as a web app on your home screen.
Note: This feature may not be available in some browsers.
Hah, I also went for some Ice Cream too. Local place makes it in house, so good. I try to go once a month.View attachment 64392Went looking for @JaviLM at Daikoku.
My PPF guys asked me to get a replacement "LOTUS" text for the rear, as they said they'd likely get damaged when they came off. $75 for that but the new one is over the PPF just perfectly now.For everyone who had full body PPF. I am trying to find out for sure. Are the badges bolted in? Or just stuck on with double sided sticky tape?
Reason being, if they are sticky taped, then I'll have the PPF guys remove the badges and then have no seams around the badges. Then just put them back later.
Your PPF guys may just be being over cautious here. Just get some dental floss and "saw" through the black double sided tape holding the letters on. Doing this gets the letters off with no stress on them & they won't get broken - very easy to do this yourself. Also it might help to know that the "silver" letters are made from metal whilst the black letters are plastic.My PPF guys asked me to get a replacement "LOTUS" text for the rear, as they said they'd likely get damaged when they came off. $75 for that but the new one is over the PPF just perfectly now.
Boot letters are held on with black double sided tape. I'm not sure about the bonnet badge.For everyone who had full body PPF. I am trying to find out for sure. Are the badges bolted in? Or just stuck on with double sided sticky tape?
Reason being, if they are sticky taped, then I'll have the PPF guys remove the badges and then have no seams around the badges. Then just put them back later.
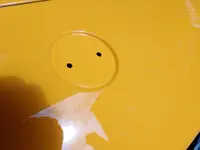
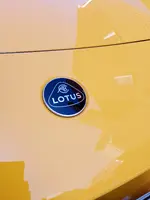
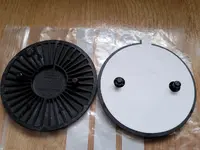
They are all just stuck on, though the front nose badge has a couple of locator nubs sitting in holes for alignment.For everyone who had full body PPF. I am trying to find out for sure. Are the badges bolted in? Or just stuck on with double sided sticky tape?
Reason being, if they are sticky taped, then I'll have the PPF guys remove the badges and then have no seams around the badges. Then just put them back later.
Does the small access panel feel like it locks in place better than the original set up?"I added the GRP carbon fiber surround."
Attached is a photo of what's underneath the nose badge: it shows where the "locator nubs" that stick out from the badge itself, go:They are all just stuck on, though the front nose badge has a couple of locator nubs sitting in holes for alignment.
Absolutely get your installer to remove them and put them back over the top... the result is way cleaner (both figuratively and literally).


For the rear badges they removed them and stuck them back on after doing the PPF using a template.For everyone who had full body PPF. I am trying to find out for sure. Are the badges bolted in? Or just stuck on with double sided sticky tape?
Reason being, if they are sticky taped, then I'll have the PPF guys remove the badges and then have no seams around the badges. Then just put them back later.