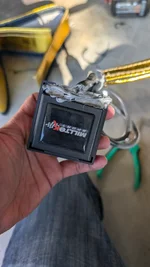
Hello fellow enthusiasts! I'd like to show you a solution I've created to help keep the Milltek valve controller unit and connector out of the elements.
When I bought my valve controller and saw it was recommended to install the unit using a plastic bag to keep it dry, I wanted a more elegant solution. I designed and printed this enclosure for my own installation, showed the Houston Emira Group, and it became pretty popular. ...So I thought I'd offer it here as well!
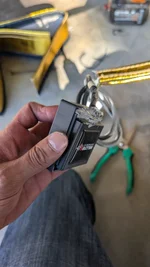
There are two versions available, both include a .18oz tube of E6000 Premium which is designed for plastic such as ASA. Both of my enclosures are compatible with V1 and V2 versions of the Milltek controller. Choices outlined below:
The enclosure is made with ASA plastic and comes in two halves. Installation is as follows:
(Contact me for other locations)


When I bought my valve controller and saw it was recommended to install the unit using a plastic bag to keep it dry, I wanted a more elegant solution. I designed and printed this enclosure for my own installation, showed the Houston Emira Group, and it became pretty popular. ...So I thought I'd offer it here as well!
There are two versions available, both include a .18oz tube of E6000 Premium which is designed for plastic such as ASA. Both of my enclosures are compatible with V1 and V2 versions of the Milltek controller. Choices outlined below:
- V1 - Plain square box with no zip tie tabs. (I am told there is a placement for the V1 controller for which the box with no tabs is a better fit)
- V2 - Square box with zip tie tabs for easier and safer mounting. Zip ties should still be installed over the box but the tabs help keep the box from slipping out of the zip tie.
The enclosure is made with ASA plastic and comes in two halves. Installation is as follows:
- Insert the controller into the bottom half.
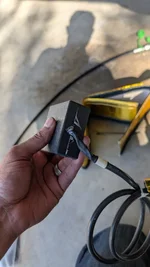
- Attach the top using the included E6000 Premium adhesive and clamp/weight it to dry.
- Once the halves are joined together you should smear some of the adhesive along the seam around the box to ensure weather resistance.
- For the cable exit, use adhesive to seal this area.
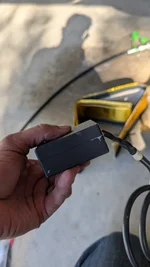
- Wait for the adhesive to dry, 24hr recommended. And install on the car!
(Contact me for other locations)
Last edited: