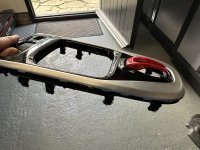
I’ve never liked the red starter switch cover. Esp on a Seneca car with black alcantara interior and yellow brake callipers.
If I had a red car or red callipers it makes sense but red doesn’t work for my car…
I wanted to take it off to paint / stain / powder coat it but sadly it’s plastic welded (melted) into place.

So whilst having the gear gaiter replaced I took the opportunity to paint it…

I’m not 100% sure I’ve got the colour right but I think it looks much better. (I’ll put it back on the car once the gaiter returns.


If I had a red car or red callipers it makes sense but red doesn’t work for my car…
I wanted to take it off to paint / stain / powder coat it but sadly it’s plastic welded (melted) into place.
So whilst having the gear gaiter replaced I took the opportunity to paint it…
I’m not 100% sure I’ve got the colour right but I think it looks much better. (I’ll put it back on the car once the gaiter returns.
")